I will share my technique on how to accommodate back closure to your favorite pattern!
A pullover style makes perfect loungewear.
There are many reasons to make a bralette with a closure too!
It's much easier to put it on, especially if you have broad shoulders or larger cup size.
It can provide you more support since pullover styles are usually a little looser so they can be comfortably put on and off.
You can take it off without the need to take the shirt off, lol.
And for me, it feels just so much more like a real bra than just a teenage bra :)
so,
How to add a closure to the pullover style pattern?
.jpg)
Pattern choice
I used a free pattern - Barrett Bralette by Madalynne to demonstrate the pattern adjustment.
The alternation will be made only to the back piece.
This tutorial is suitable for the Forme bralette pattern too if you want to use a wide bottom band elastic!
Design choice
I wanted to keep the wide-band elastic.
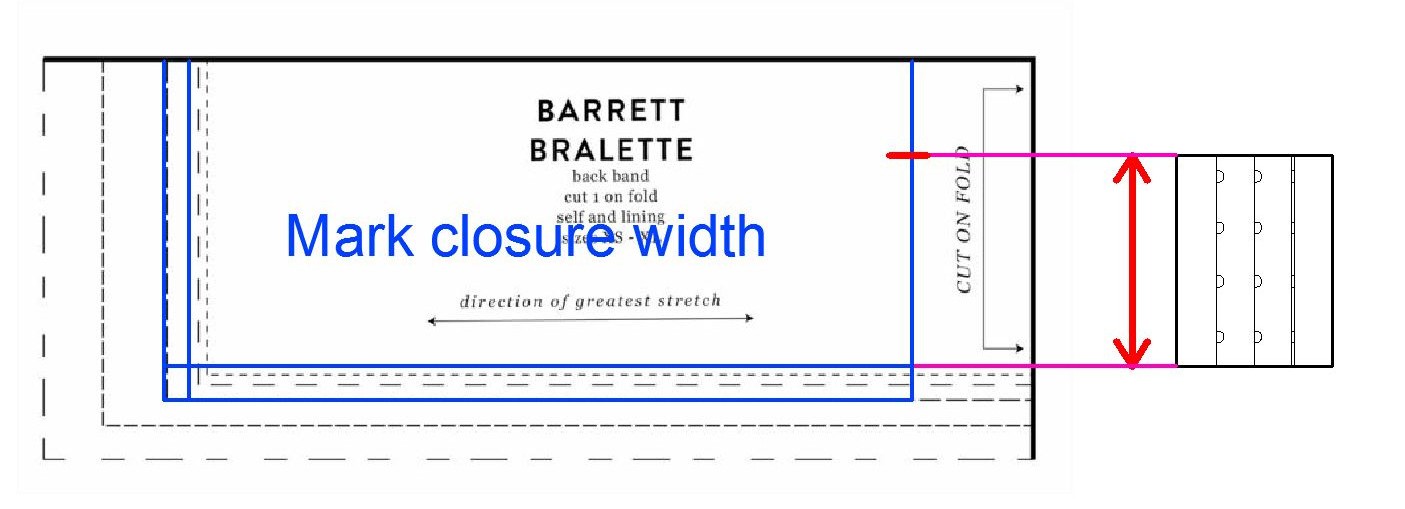
If you have closure by meter than you don't have to worry about the closure width at all and you are done.
I didn't have such closure, therefore I used two 3x3 closures. One above each other.
.jpg)
Pattern adjustment
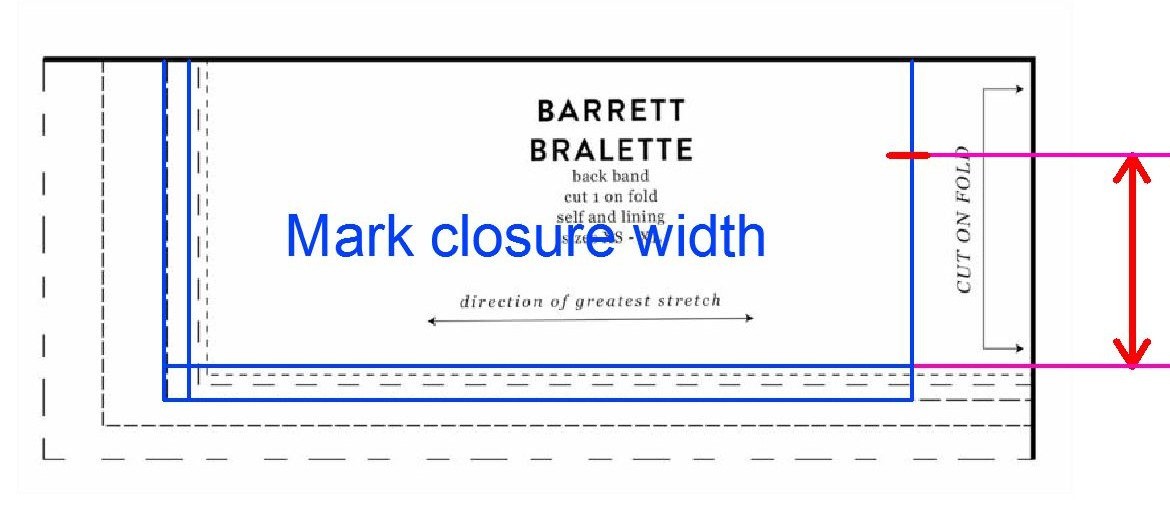
Step 1:
Measure the closure height (C.H.).

Step 2:
Measure the bottom elastic height (E.H.).
Subtract the bottom elastic height (E.H.) from the closure height (C.H.). This is your remaining closure height (R.C.H).
You will need it in a short time.

Step 3:
Grab the back band pattern.
Mark all the seam allowances. This depends on the selected pattern and design.
For example, Barrett has 6mm seam allowances everywhere.
For the Forme bralette, you can skip this step because there are real shape lines included.

Step 4:
Remove 2 cm* from the CB seam.
This is your new backline.
* Please consider, is the band already nice and snug? If it's not you may want to remove more.
I ended up removing 4 cm from each side because you don't need the pull-over ease anymore.
This recommended 2 cm will not make the band tighter. This will be replaced by the closure itself.
For the Forme bralette, you can skip this step because it already counts for the closure.

Step 5:
Mark the remaining closure height (R.C.H.) you computed in step 2 from the bottom seam allowance.
Step 6:
Connect edge points and add seam allowance back (if you need to).


You are done!
Now you can start sewing!

What if I don't want wide bottom band elastic?
Of course, this adjustment works for any style or pattern you are using.
Bralette finished with picot plush elastic adjustment:
The procedure is the same.
In step 5 mark the whole closure height.
Continue with step 6:
How it looks in the completed garment:

I hope it is helpful for you!
If there is anything unclear, please, let me know ♥
Do you like this tutorial?
Don't want to miss any future posts?
Type your email address below and receive a reminder next time a write a blog post!
↓