Lace and mesh underwear is just perfect for the summer.
It's so fresh and airy!
You are never too hot.
But in the winter you may like to add a foam insert.
Or maybe not just because of the winter.
It's always nice to have an option, right?
The Forme bralette instructions come with notes,
how to sew the bralette with the opening to insert the removable padding.
This way you can have just one bralette
and add or remove padding based on your current preferences!
Pre-molded padding or sewing your own?
Of course, you can just buy the removable padding, and you are done!
In the photo below you can see the pre-molded cup in nude and sewn cup from bra making foam in black

The disadvantage of pre-molded cup padding
• It doesn't exactly match the shape of the bralette
• It may be too small and therefore there may be visible lines from the padding
• It can be too wide - but you can cut the excess away
• When the shape doesn't match the cup shape, it will move in your bralette
• You cant alter the shape of the padding
How to make your own padding?
It's really easy!
Materials needed to make your own removable padding for your bralette
• Cut and sew foam
• Your bralette pattern
• Sewing machine :)
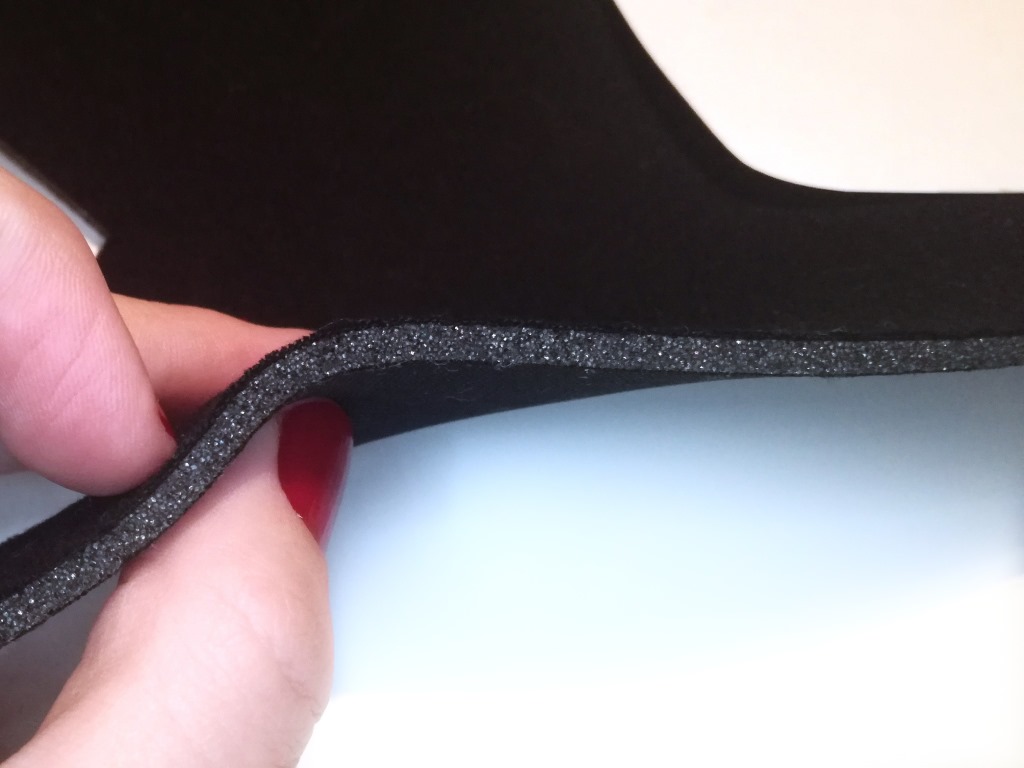
What is cut and sew foam?
It is a bra making fabric used to make bra cups.
It is a fabric with a foam-like structure (see image below)
It is a thick fabric - you can find it in thickness usually from 1-3 mm
It is a flat fabric, you need to sew it together to make it a 3D, cup-like shape
Preparing a pattern for foam padding
Step 1:
Remove all the seam allowances from both cup pieces (blue line)

Step 2:
Make the shape smaller based on the picture
We want to keep the actual shape of the bralette, so the foam doesn't wrinkle inside
Therefore, we want to avoid the upper edge elastic and seams
Then make all shape about 2 mm smaller

You can make the shape a little rounded around the edges
Blue line - original pattern shape without seam allowances, pink line new pattern for your foam insets
Don't forget to mark the apex notch
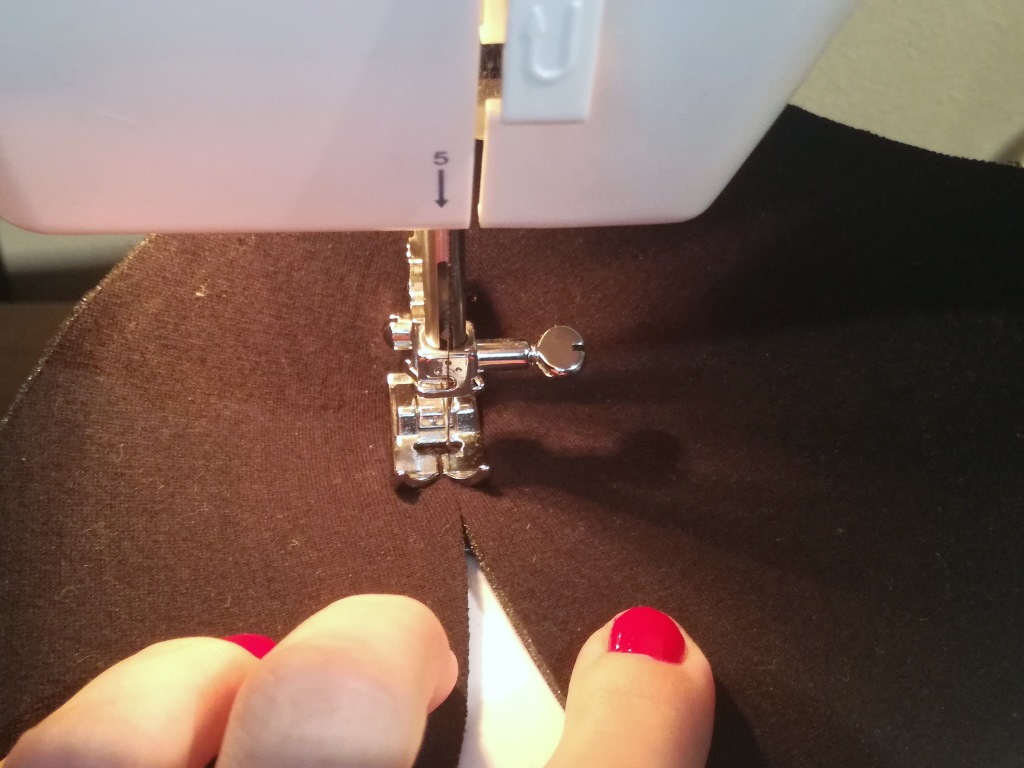
Step 3:
Sew the foam together
Foam can sew as normal fabrics using seam allowance (in that case you need to add them to the pattern above!)
or, you can just butt the pieces together and sew them with a zig-zag stitch.
I like this method better because the result is less bulky. But sure it's all about preferences.
I use the widest possible zig-zag stitch with a short length (width 5, length 1) or you can use a satin stitch


Place the pattern pieces together and sew with a wide zig zag stitch.
Press them together as you sew and allow the foam to take its shape while its sewn (see the photos bellow).

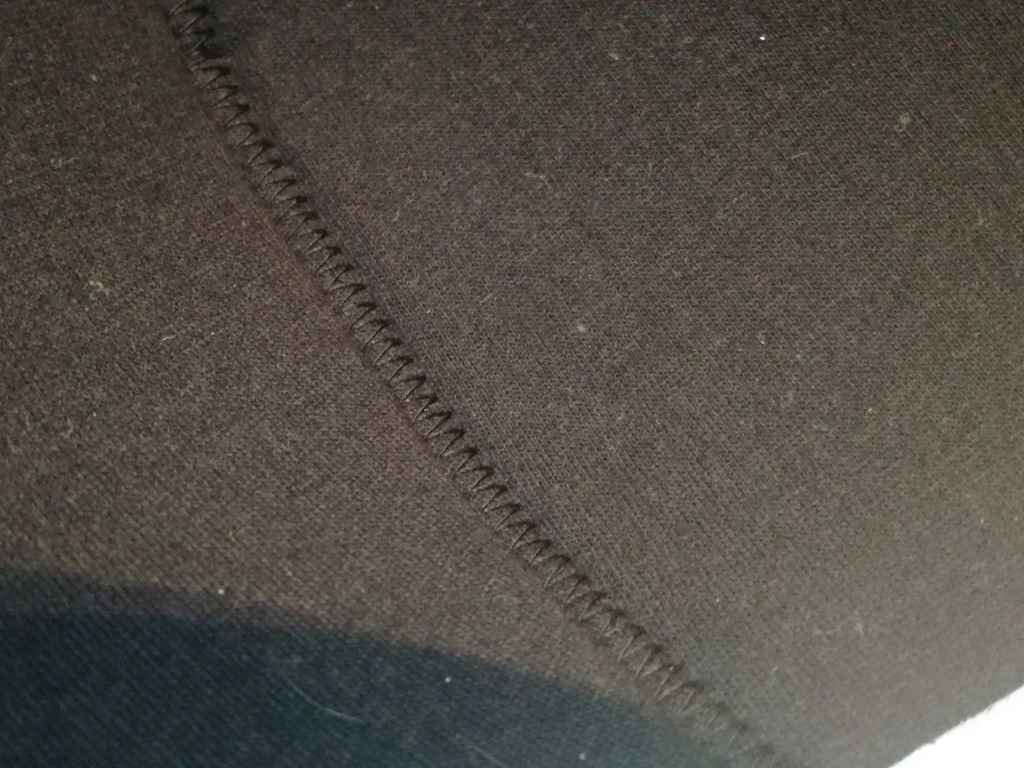
The seam should look something like that
Step 4:
Check if the shape and size fit your bralette you can cut it out now.
Next, you can zig-zag the edges to make them flat or cover them with fold-over elastic if you want.
Insert your new padding into your bralette (between the lace and the mesh lining) and wear :)

Don't forget to take it off for the washing time!
Still don't have your Forme bralette pattern?
You can buy it here